Bathroom Planner Overview
This section provides an overview of the user interface and the functionalities of the bathroom planner via the Bryo sample bathroom planner.
The Layout of Bathroom Planner
The components of the bathroom planner are as follows:

- The steps of the Bathroom planning.
- The Common toolbar.
- The Design toolbar with categories and search.
- The scene.
- The Edit panel.
- The Navigation toolbar.
- The Zoom toolbar.
- The Help Center.
- The Price area.
The Bathroom Planning Steps
This section explains the steps to design the bathroom.
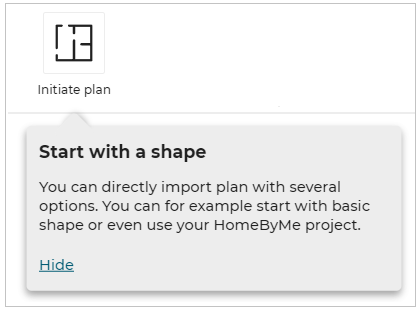
Floorplan
You can draw the floor plan of your bathroom in this step or import it from the HomeByMe application.
For more information, see Floorplan.
Design your Bathroom
You can design the bathroom by adding or editing furniture. For more information, see Design your Bathroom.
Summary
It is the final summary of the bathroom after modifying it according to the user requirements. You can print media, export project, and add notes to the project &/or products in this step. For more information, see Summary.
Navigate Bathroom Planning Steps
You can switch the planning steps by selecting the tabs from the top bar or by clicking on the Next button located near the pricing area.
The products added in the Floorplan step cannot be selected or edited in the Design your Bathroom step and vice versa.
The Common Toolbar
Following commands are available in this section:
| Icon | Function | Description |
|---|---|---|
| Add Notes | To add either project notes and/or item notes. | |
| Item List | To display the list of products used in the project. | |
| Measurement Tools | To measure the distance between two points/ surfaces. | |
| Undo | To undo the last operation. | |
| Redo | To redo the last undone operation. | |
| Save | To save the project. | |
| Close | To close the application. |
❗️ From 980px to 1200px (screen resolution), the location of the buttons "View images" and "Annotations" is changed to have the needed space to display every feature. In this case, these buttons are moved to the top bar as shown in the image below. For the resolution superior to 1200px, these buttons are placed in the initial position.

Save
- Click the
 icon to save a project.
The pop-in to enter the project name and description is displayed, as shown below:

Enter the name and description of the project and click the Save button to save the project.
The maximum number of characters for the project name is 300.
If the project name exceeds 300 characters, the following notification is displayed to the user:

Item List
⚙️ Set up: Application distribution parameter itemList 🔗.
The Item List option is not available in the application when the value ofitemListis set to True. The default value of the parameters is set as false.
The Available Shortcuts
Several shortcuts are allowed in the planner to do some actions, the list is described below:
| Shortcut (Windows) | Shortcut (Mac) | Description |
|---|---|---|
| Ctrl + A | Cmd + A | Select all the products in the project |
| Ctrl + C | Cmd + C | Copy the current selection |
| Ctrl + V | Cmd + V | Paste the current selection |
| Ctrl + D | Cmd + D | Duplicate the current selection |
| Ctrl + F | Cmd + F | Open the global search |
| Ctrl + S | Cmd + S | Save the current project |
| Ctrl + Z | Cmd + Z | Undo the last action in the planner |
| Ctrl + Shift + Z | Cmd + Shift + Z | Redo the last action in the planner |
| Delete | Delete | Delete the current selection |
| Enter | Enter | Enter the current selection |
| Esc | Esc | Escape the current selection |
| Alt + ↑ | Alt + ↑ | Move up the avatar (virtual visit) |
| Alt + ↓ | Alt + ↓ | Move down the avatar (virtual visit) |
| Shift + → | Shift + → | Rotate right the avatar (virtual visit) |
| Shift + ← | Shift + ← | Rotate left the avatar (virtual visit) |
| Shift + ↑ | Shift + ↑ | Rotate high the avatar (virtual visit) |
| Shift + ↓ | Shift + ↓ | Rotate low the avatar (virtual visit) |
| ← | ← | Move the avatar clockwise |
| → | → | Move the avatar counterclockwise |
| ↑ | ↑ | Move forward the avatar |
| ↓ | ↓ | Move backward the avatar |
| Alt + ↑ | Alt + ↑ | Zoom in |
| Alt + ↓ | Alt + ↓ | Zoom out |
| Shift + → | Shift + → | Rotate right the avatar |
| Shift + ← | Shift + ← | Rotate left the avatar |
| Shift + ↑ | Shift + ↑ | Rotate high the avatar |
| Shift + ↓ | Shift + ↓ | Rotate low the avatar |
| Ctrl + Click Left | Cmd + Click Left | Multi-selection of the elements in the planner |
| Ctrl + U | Cmd + U | Change unit measure dynamically in the application |
| Ctrl + H | Cmd + H | Open the help center |
| Ctrl + F6 | Cmd + fn + F6 | Switch between 2D, 3D, and Front Elevation views |
- You can also copy/paste the products from one project to another with the copy (Ctrl+C) and paste (Ctrl+V) shortcuts except opening/bay products like door/windows.
- You can select multiple products by simultaneously pressing the Ctrl key, left click of the mouse and drag the cursor over the desired products.
The Project Note
- Project Notes
The user can add the project notes to the bathroom project.
To add a project note:
Select Item Note from the common toolbar, write a project note.
Click the Validate button to save the project notes.
A number is shown beside the Project Notes icon if a note is added to the project.
Yo can add only 1 project note to your project.

- Item Notes
The user can add notes to the items in the bathroom.
To add item note:
Select an item in the project, write a note.
A number is shown beside the Item Notes icon which is the count of notes.
Click the Validate button to save the item notes.
A project may have multiple item notes.
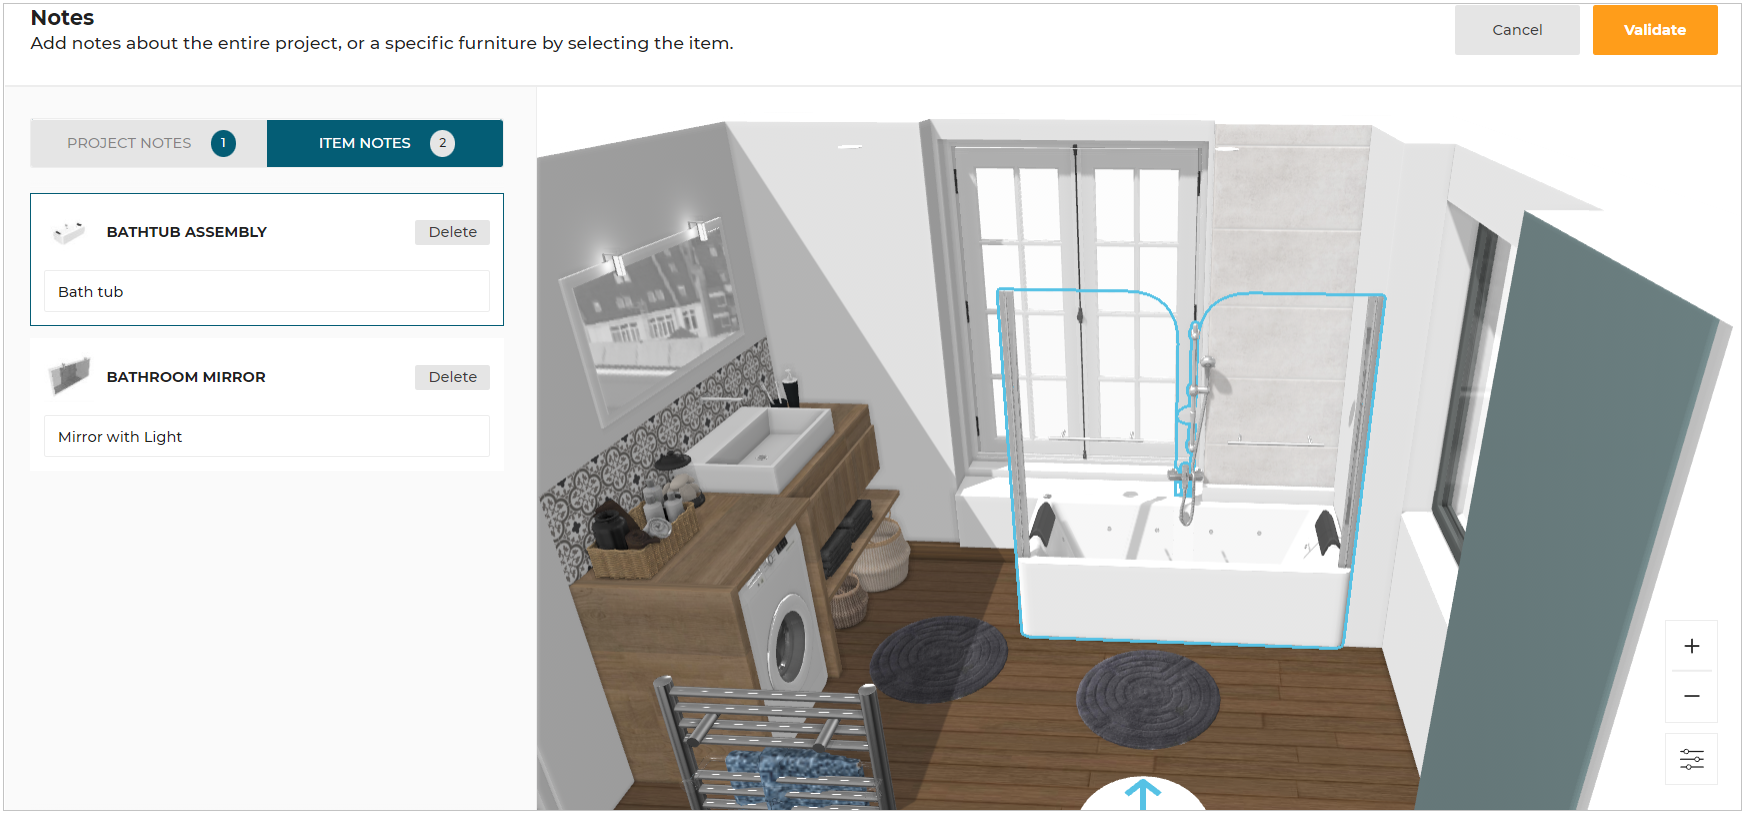
- The total number of notes i.e. sum of project notes and item notes is shown in the toolbar.
- Item notes can be added to all items that are numbered in 2D plans, with the exception of linears.
- On replacing an item, the associated item note is deleted.
- It is recommended to add a note after finalizing the item.
The Design Toolbar
This section contains commands and options to design your bathroom.
The list of commands, options varies in every step of the bathroom planner.
The Scene
On the scene, icons are displayed to help you rotate, elevate and drag the product in the room.
| Icon | Function | Description |
|---|---|---|
| Pan | To drag and position product. | |
| Rotate | To rotate product. | |
| Elevate | To elevate the product. |
Edit Panel
After selecting a product in the scene, the Edit panel is displayed to allow you to make changes to it.
The Navigation Icons
The navigation icons allow you to switch from a default 3D view to a 2D or first person view.
| Icon | Function | Description |
|---|---|---|
| 2D | Activates two dimensional view. The room names are displayed and editable only in the 2D view of Floorplan step. | |
| 3D | Activates three dimensional view. You can visualize a 3D view of the bathroom. | |
| First Person | Activates the first-person view, to give the real-life experience of the bathroom. |
The Reset View Icon
The zoom icons allow you to zoom in or zoom out the scene.
| Icon | Function | Description |
|---|---|---|
| Reset View | Appears (a) When the 2D project is out of view, or (B) The avatar is outside the 3D project. |
The Zoom Icons
The zoom icons allows you to zoom in or zoom out the scene.
| Icon | Function | Description |
|---|---|---|
| Zoom In | To zoom in the design view. | |
| Zoom Out | To zoom out the design view. |
You can also use the mouse wheel to zoom in or out.
The Help Center
| Icon | Function | Description |
|---|---|---|
| Help Center | To access the tooltips and planning tabs. A number indicates planning errors available in your design. |
Tool Tips
To view tool tips, go to the help center.
- Click Help center icon to open the Help center.
A List of available tooltips is displayed in this tab, as shown below:

- Click the Show button to display the tooltip in the design area.
⚙️ Set up: Guided tool tips are only available when
guidedTouris set to 'true' in application distribution settings.
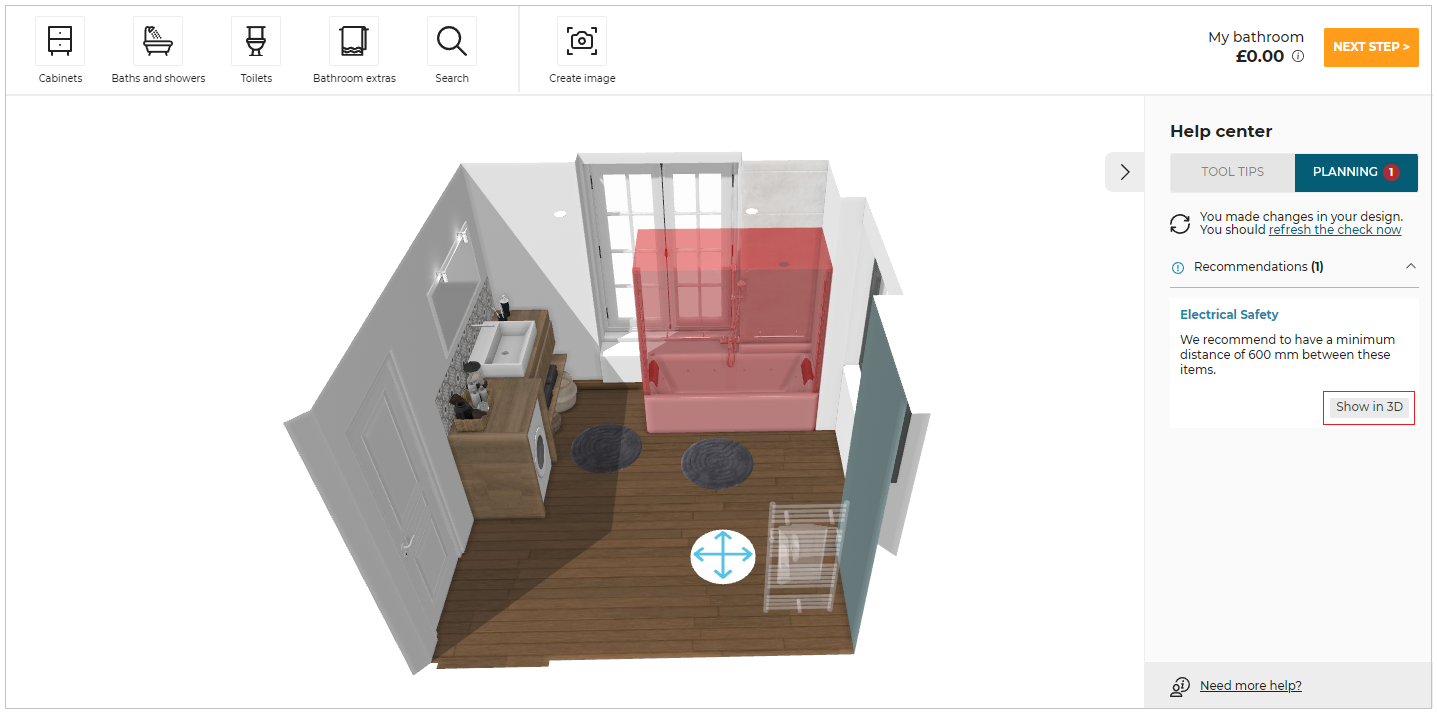
Planning
Warnings and suggestions are displayed in this tab, to help you design an error free bathroom.
Click the show in 3D button of the warning/ recommendation, to highlight the error in the bathroom.

After click on Show in 3D button, the furniture for which the warning / recommendation is displayed, is highlighted in planner, as shown below:
If an error mentioned in the business rule is not in the current view in the front elevation view, the notification to switch to the 3D view or the wall is displayed, as shown below:

Additional Assistance
Additional assistance is available in the help center for the floorplan step and the design your bathroom step. The types of assistance available are:
- call for support.
- Launch video co-design.
- Book an appointment.
- Find a store, etc.
Click the Need more help? option to display the available assistances.
Additional assistance is only available when
additionalHelpis set to True in application distribution settings.
The Price Area
The price is computed in real time considering all the products and items added to the scene (except the bathroom extras that are not priced). Based on the payment selection in step 3 - summary, the price in step - 2 is shown in different format. It can be all amount at once.

It can be monthly amount as per loan period selection in monthly payment.

The Next button takes you to the next step of the bathroom planning.
Opening the Existing Project
While opening the saved project, it opens the project in step-2 and zooms in to fit the bathroom in the available space of the planner.